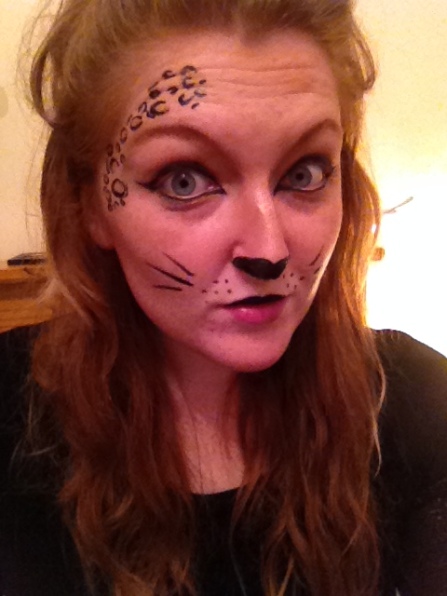
A: This isn’t a tutorial as such but we have been far too excited about Halloween recently, and we couldn’t wait any longer to practice our make-up for Halloween so with a take away and both of our make-up stashes at the ready we went for it (on a Wednesday night whilst wearing our pj’s…!). We couldn’t not take photos to show you all, so we thought we would give you a run down of how we created the looks. Please bear in mind that we are in no way qualified as make-up artists. I only wore mascara up until a year ago so I’m still learning! Chloe’s Sugar Skull tutorial is here, and here’s my practice run…
I know that a leopard isn’t particularly scary, but I cannot tell you how much fun I had doing this. So I don’t even care that it isn’t scary – I’m being a leopard for Halloween. And a ginger one at that.
Here’s how I achieved the look…
1. Base. Apply a bb cream all over. You can use foundation obviously, but I wanted to let my freckles show through because after all, a leopard can never change it’s spots. I used Mac’s Prep and Prime BB Cream, which is what I use everyday anyway.
2. Contour! I used my bare Minerals powder in Warmth – which is a perfect colour for this look. I contoured heavily around my cheek bones, forehead and chin with a large brush. I then used a smaller brush to contour down my nose and up into my brows. I have really fair eyebrows so I used this powder to bulk them out too.
3. Eyes. First I applied Bootycall from my Naked 2 palette all over my lid, and underneath my eye too. I then used a matte brown eye shadow (one which I received in my You Beauty box this month, click here to see it!), in my crease with Half Baked from my Naked 2 palette. I took this out further than I normally would because the eyes are one of the main parts of this look. I then blended this out and up to my brow. I also took the Half Baked, which is a lovely gold shimmer, underneath my waterline. After the eyeshadow, I applied the liquid liner. This took A LOT of patience. I always wear a winged liner, but never like this before. And like I already said, I am no Beauty professional. Obviously it will be a lot neater when I do it on the night, and I will also fill in my waterline with a black pencil to make it even more dramatic. Undecided on whether to wear false lashes or not though, so your opinions would be great!
4. Leopard Spots! These were the part which were the most fun. Again, on the night I will do more of these, but I just wanted to get a feel for doing them on the practice run. They are so super easy to do, and I think they look really effective. I used a liquid liner to draw some ‘c’, ‘u’ and ‘o’ shapes, and then used a damp brush in the gold eye shadow to apply to the centre of some of the spots. I also used this eye shadow to highlight down bridge of my nose and the groove above my top lip. If you can find a lovely shimmery gold, it looks really effective.
5. Nose and Whiskers. I used the same liquid liner to draw an outline of my nose on my erm…nose. I then filled it in and added little spots below and flicks for whiskers. I used the liner to fill in my top lip too. I think this looks super effective, but you could use a red lipstick too if you wanted a different look!
I had so much fun creating this make-up and I can’t wait to show you the whole finished look! What are your Halloween plans? #twolittleowlsblog

super cute 🙂
LikeLike
Thank you ❤️
LikeLiked by 1 person
You look stunning I love the leopard print effect :)x x
http://millieerosee.blogspot.co.uk/
LikeLike
Thank yoi! Its so super easy to do! Xx
LikeLike